Dynamic Landing Pages
You are sending outreach to a list of businesses and you want each one to land on a page that already knows who they are, without building a page per account.
A dynamic landing page turns one page into a personalised page for every prospect on your list. The prospect's identifier travels in the link you send, and the page fills itself in when they open it.
Before you begin
You have a site with at least one verified domain, and you have deployed it at least once.
Your business data is already in the platform. A dynamic landing page reads records that are already there; it does not import them.
You know which identifier you hold for each prospect: a Google place ID, a website domain, a VayaPin pin, or a company registry number such as a VAT number.
Steps
Step 1 — Create the page
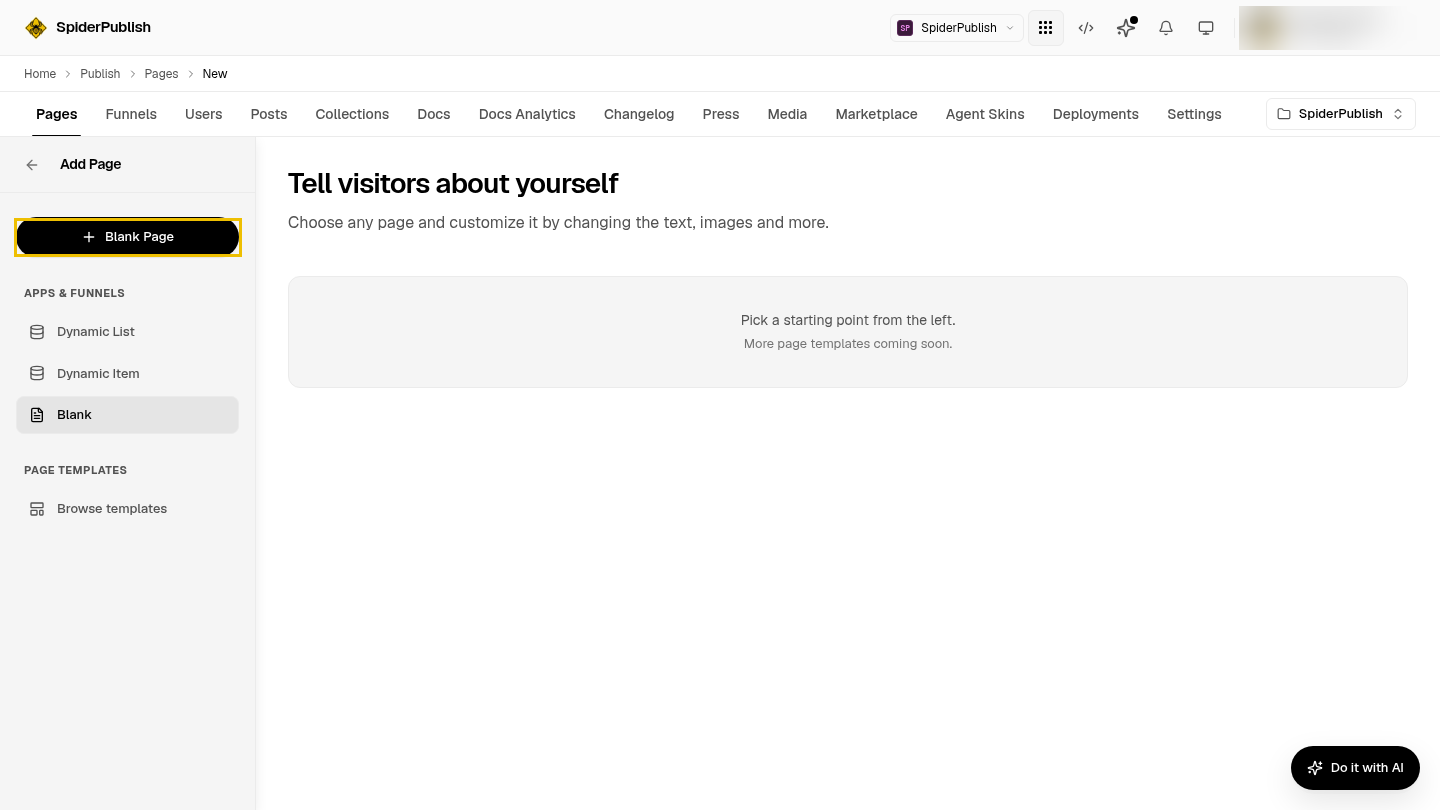
Go to Pages and select New. The create form offers Blank Page, Dynamic List and Dynamic Item. Choose Blank Page.
The dynamic landing template is not offered on this screen. You set it in the next step.
Step 2 — Set the template to Dynamic Landing Page
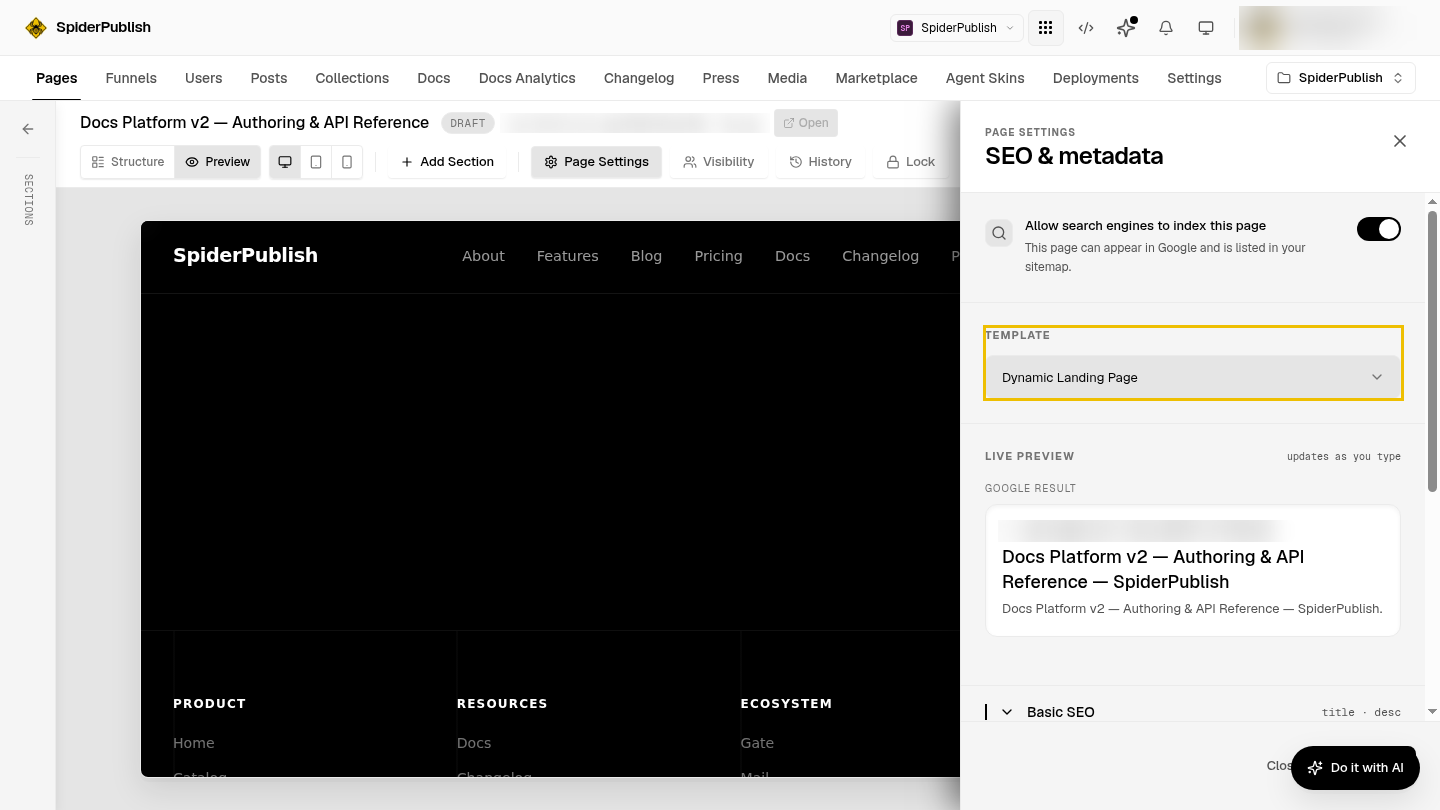
In the page editor, select Page Settings, then set Template to Dynamic Landing Page.
This field is what makes the page personalised. Until it is set, the page is an ordinary page and the /lp/ links below will not work.
Step 3 — Write your copy with placeholders
Write the page as you normally would, and put {business} and {city} wherever the prospect's details belong. When somebody opens the page, those placeholders are replaced with the real business name and city.
Keep placeholders in the body copy: the headline, the subheading, the call to action. Do not put one in the page's title field. Page titles are not substituted, so a literal {business} would show in the browser tab and in the preview when the link is shared.
Step 4 — Choose what an unidentified visitor sees
Some visitors arrive without a working identifier: the link was forwarded, it is months old, or a character was lost in a copy and paste. Those visitors still get the page, with a stand-in name in place of the business.
By default that stand-in is the words "Your Business". To use your own wording, set a demo_business value in the page's custom fields. An agent or an API call can set it today:
curl -X PATCH ".../dashboard/content/pages/PAGE_ID" \
  -H "Authorization: Bearer $TOKEN" -H "Content-Type: application/json" \
  -d '{"custom_fields": {"demo_business": "your business", "demo_city": "your city"}}'
Step 5 — Add your salespeople, if you want rep-branded links
If you want each rep to send links carrying their own name, photo and booking link, add them to the site's template configuration under salespersons. Each one needs a short slug, such as ajay or maria, which is the value you will put in the link.
Skip this step if one page for the whole team is enough.
Step 6 — Publish the page and deploy the site
Publish the page, then deploy the site. Both are needed: publishing makes the page live in the content store, and deploying pushes the routes to your domain.
Step 7 — Build and send the links
Add the prospect's identifier to the end of the page URL:
https://yoursite.com/lp/wifi-proposal/0x47e66fdad6f1cc73:0x341211b3fccd79e1
https://yoursite.com/lp/wifi-proposal/ajay/0x47e66fdad6f1cc73:0x341211b3fccd79e1
The first form personalises to the prospect. The second adds the rep.
If your identifier is not a Google place ID, name the key at the end of the link:
https://yoursite.com/lp/wifi-proposal/acme-plumbing.de?resolve_key=domain
https://yoursite.com/lp/wifi-proposal/ajay/DE123456789?resolve_key=vat
Verify it worked
Open one of your links in a private browser window. The headline should show the real business name in place of {business}.
Then open the same page with a deliberately wrong identifier, by changing a character in it. The page should still load, showing your stand-in name instead.
If both are true, the page is working: it personalises when it can, and stays usable when it cannot.
Troubleshoot
The page shows
{business}instead of a name. The placeholder is in the page's title field rather than the body copy. Titles are not substituted. Move it into the headline or the body text.Every prospect sees the stand-in name. The identifier is not resolving. Check you are using the right key: a domain needs
?resolve_key=domainon the end of the link, because an identifier is read as a Google place ID by default.You are resolving by email and always get the stand-in. Email is accepted for backwards compatibility but does not identify a business, so it never resolves. Use the business's domain instead.
The link returns 404 rather than showing the stand-in. A 404 means the page slug is wrong, not the identifier. Check the page is published and that the slug in the link matches the one in Pages.
The page loads but the rep's details are missing. The slug in the link does not match a
salespersonsentry. Slugs are matched exactly, and a missing match leaves the rep block empty rather than failing.
Related
Pages — the block model and folders behind every page.
Live Collections — the other live data a page can read.
Content API — the
GET /content/leads/resolvecontract, every identifier key, and the error codes.