Create a Custom Collection
Pages, blog posts and docs cover most of a site. Sooner or later you need something they don't fit: case studies, a staff directory, a product range, testimonials. A custom collection lets you define that type yourself — you choose the fields — and then every entry you add becomes a real page on your site, with its own address and its own SEO.
This walks you through building one in the dashboard, start to finish. There is an agent route too, and it's at the bottom.
Who this is for
Anyone running a SpiderPublish site who has a set of similar items to publish. You do not need to write code, and you do not need an AI agent — the whole thing is clickable.
What you'll learn
How to create a collection and choose its fields
How to add entries and publish them
How to get them onto your site
How to hand the same job to an AI agent instead
Before you begin
You are signed in to the dashboard.
You have picked which site you're working on (the site name shows at the top right).
You know roughly what fields your items share. You can change them later, so a rough idea is enough.
Steps
Step 1 — Open Collections
From the dashboard, go to Publish → Collections. This is the list of every content type you have defined on this site. A new site starts empty.
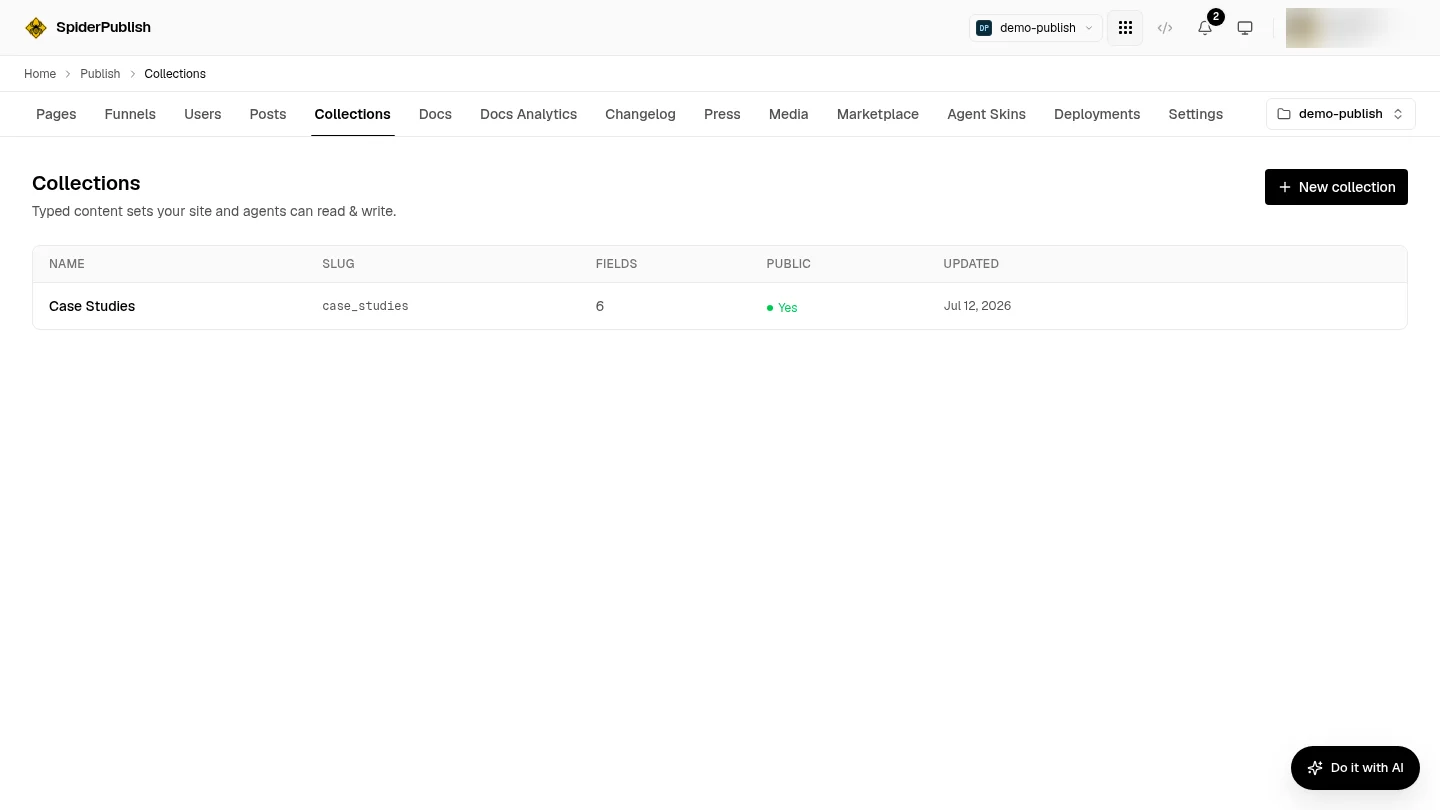
Each row shows the collection's name, its slug (the short name used in addresses and by agents), how many fields it has, whether it is public, and when it last changed.
Click New collection to start one.
Step 2 — Choose the fields
This is the part that matters. You are describing the shape every entry will share.
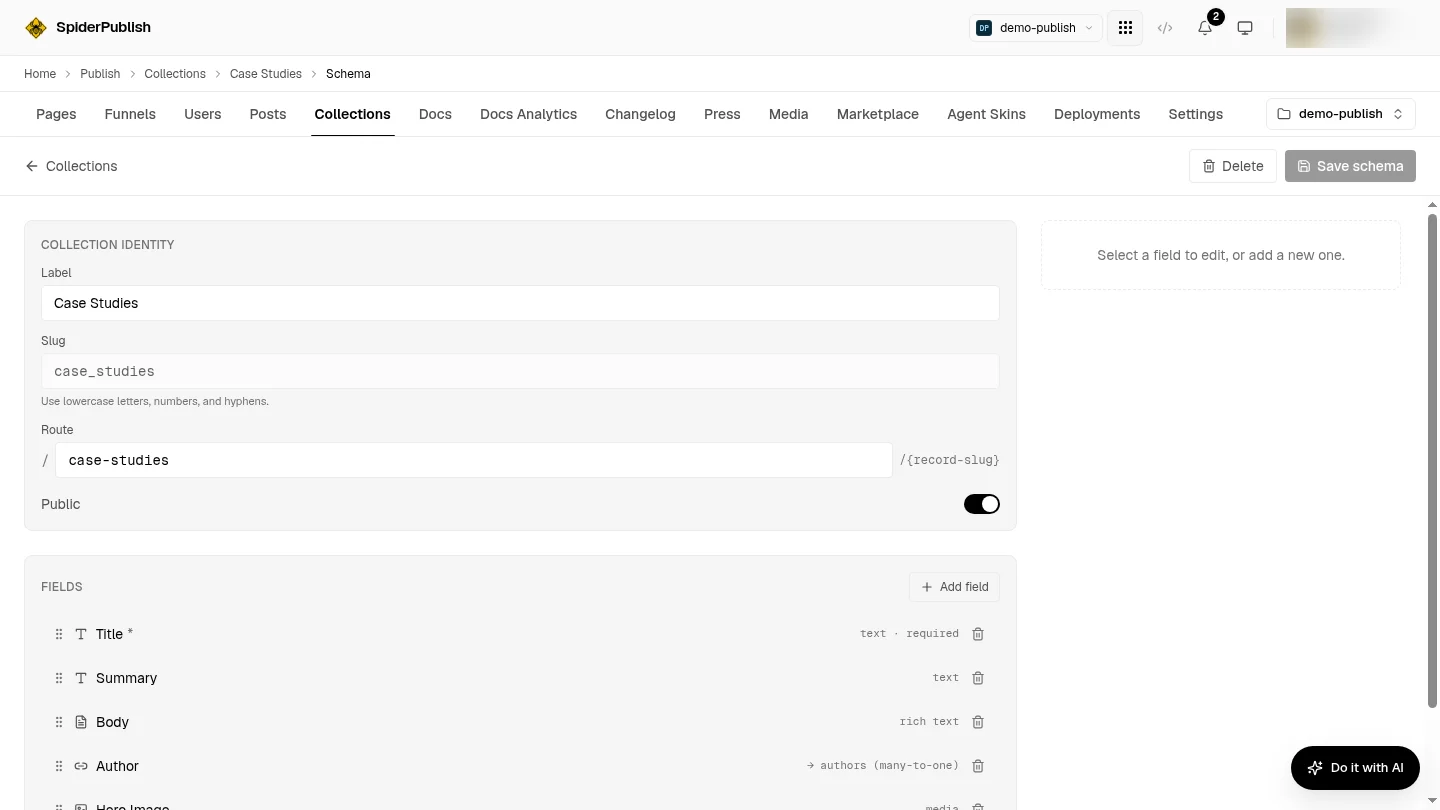
Three things at the top:
Label — what you call it. "Case Studies".
Slug — the short name. Lowercase letters, numbers and hyphens; no spaces, no underscores.
Route — the address your entries live under. Setting this to
case-studiesmeans an entry calledoceanview-resort-launchwill be published at/case-studies/oceanview-resort-launch.
Then Public. Leave it off while you're still working; turn it on when you're ready for the entries to be reachable on your site.
Below that, add your fields. Each one has a type, and the type decides what the editor gives you:
Type | Use it for |
|---|---|
Text | a name, a short line, a URL |
Number | a price, a count, a year |
Yes/No | a flag — featured, in stock |
Choice | a fixed list you pick from — an industry, a category |
Date | a launch date, an event date |
Rich text | a formatted body with headings and links |
Media | an image or file |
Relationship | a link to another entry, a blog post, or an author |
Blocks | full page sections, the same ones you build pages from |
Mark a field required if an entry makes no sense without it. Click Save schema when you're done.
You can come back and add fields later. Adding one does not disturb the entries you already have.
Step 3 — Add your entries
Open the collection and you get its entries. A new collection has none.
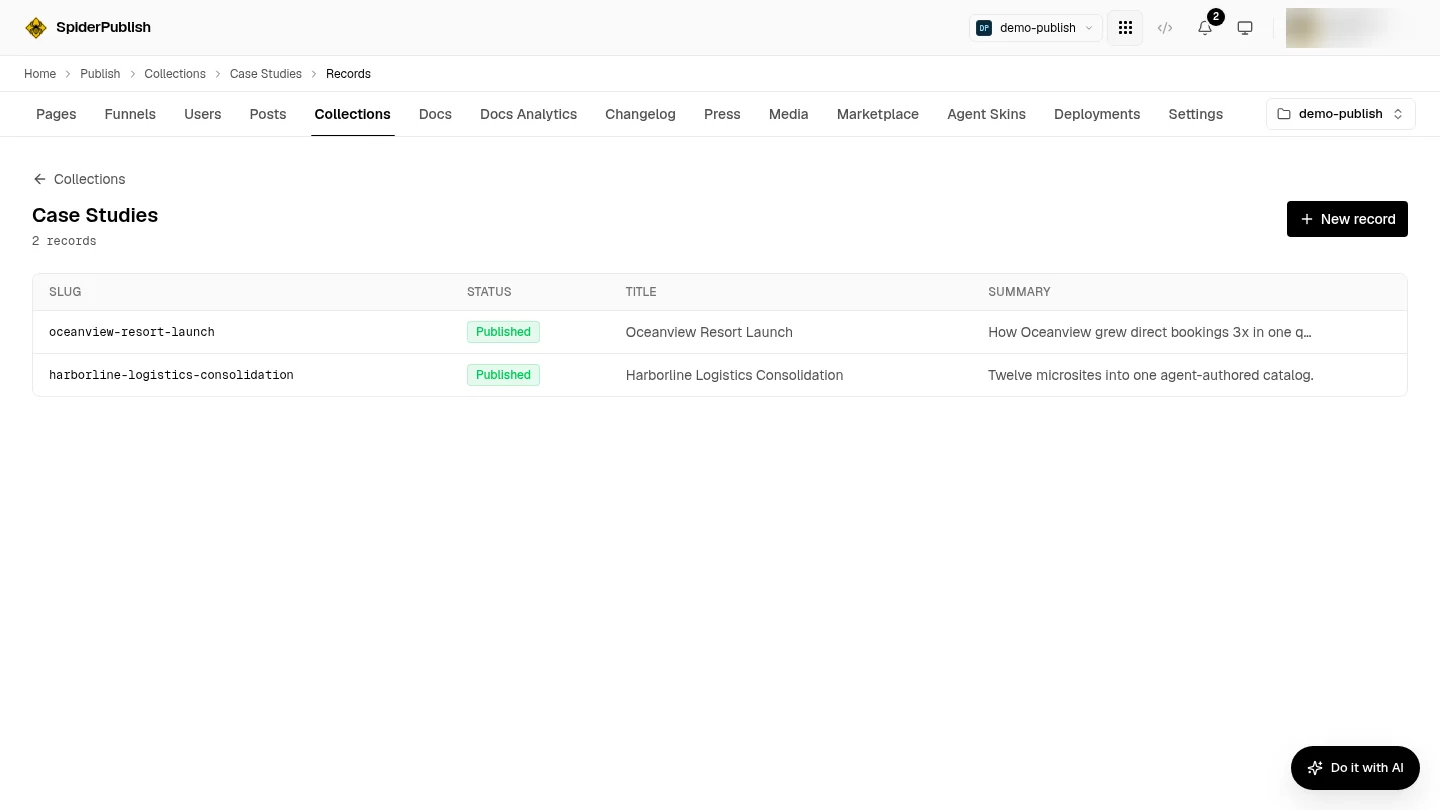
Click New record. Every entry starts as a draft, so nothing appears on your site until you say so.
Step 4 — Fill it in and publish it
The editor gives you a field for each one you defined, plus the settings every published page needs.
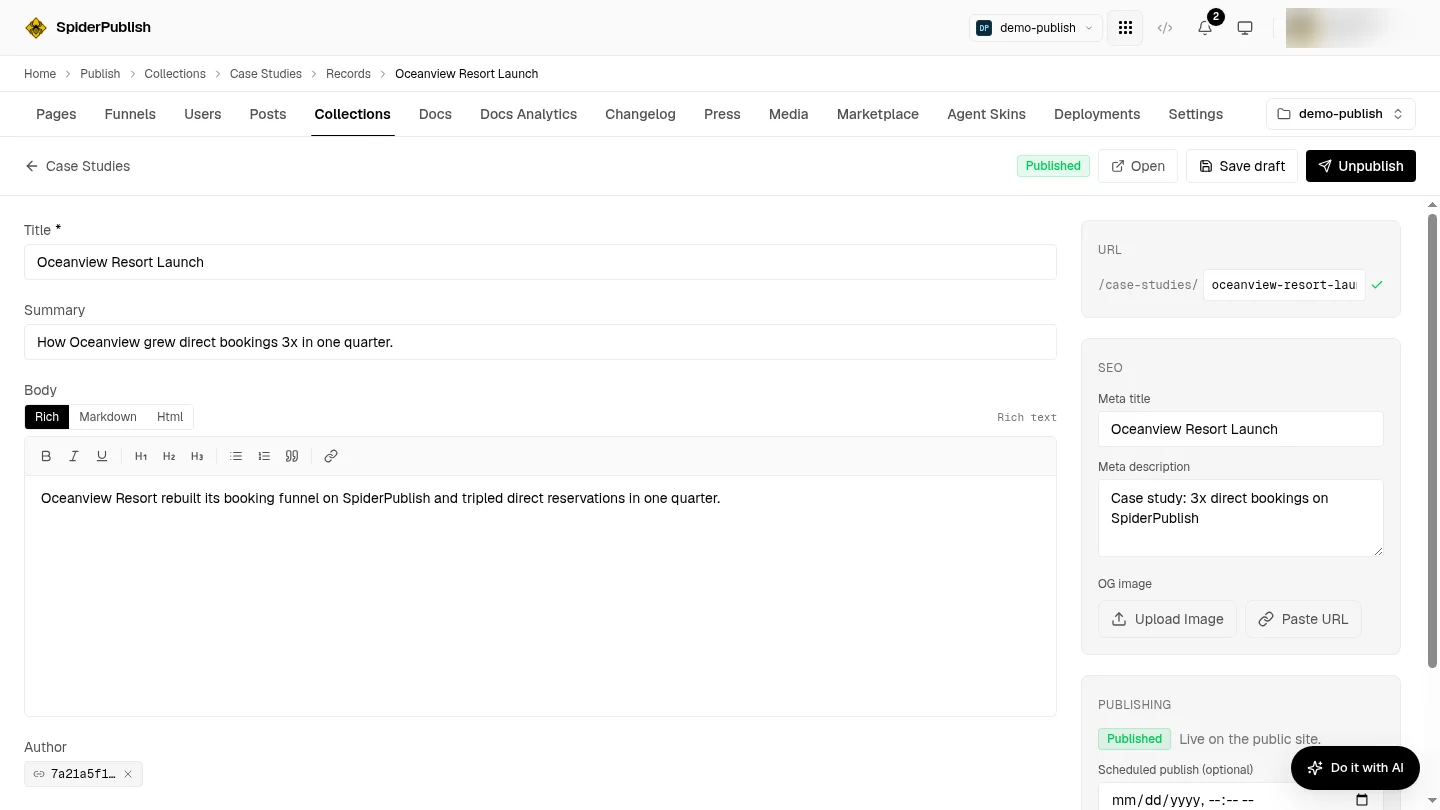
On the left, your fields. A rich-text field gives you a small editor with Rich, Markdown and Html tabs — write however you prefer. A relationship field gives you a picker.
On the right:
URL — the address this entry will have. It's built from the route you set in step 2.
SEO — the title and description search engines and social sites will show. Worth filling in; this entry is a page like any other.
Publishing — where you make it live.
Use Save draft as you work. When it's ready, Publish. To take something down later, open it and choose Unpublish — it goes back to draft, it isn't deleted.
Step 5 — Show them on your site
Publishing an entry gives it its own page. If you also want a page that lists them — a "Case Studies" index — add a page and drop a dynamic component on it pointed at your collection. It works the same way as the components that list your latest blog posts.
Individual entries don't need this. They get their address automatically from the route.
Step 6 — Deploy
One last step, and it catches people out: publishing is not the same as deploying. Publishing marks an entry as ready. Deploying pushes your site to the web.
Go to Deployments and deploy. It takes a few seconds.
Check it worked
Open your entry's address in a new tab — the URL shown in the editor, on your own domain. You should see your entry rendered as a page.
If you turned the collection public and built a list page, check that too.
Troubleshooting
I published it but the page isn't there. Deploy. Publishing and deploying are two different actions, and this is far and away the most common cause.
The address is wrong. The route comes from the collection, not the entry. Go back to the schema editor and check the Route field.
It won't let me save my slug. Slugs take lowercase letters, numbers and hyphens. Underscores and spaces are rejected. case-studies is fine; case_studies and Case Studies are not.
My rich text is showing as raw code on the page. Something pasted HTML into a rich-text field. Use the Rich or Markdown tab and let the editor handle the formatting.
I've hit a limit. Your plan caps how many collections and entries you can have. The message tells you where you are against the cap.
An import failed and nothing was added. That's deliberate. Bulk imports are all-or-nothing — if one entry is invalid, none are added, so you never end up with half a catalogue. Fix the entry named in the error and run it again.
Or hand it to an agent
Everything above can be done by an AI agent instead — and unusually, the agent can design the fields as well as fill them in. That is the real difference from a traditional CMS, where somebody has to define the shape by hand first.
If you have an MCP-capable agent connected (Claude, Cursor and others — see MCP Setup), you can simply ask. Plain instructions work:
"Create a collection called Case Studies at the route case-studies. Give it a title, a client name, an industry chosen from SaaS, Retail or Finance, and a rich-text body. Then add these four case studies from the notes below and publish them."
"Add a 'featured' yes/no field to my case studies, then mark the Oceanview one featured."
"List my case studies but only give me the title and the industry — I don't need the bodies."
That last one is worth knowing. Asking for everything on a collection with many fields returns a great deal of text; naming the fields you want keeps the answer short and the agent quick.
Two things the agent will do that are worth expecting:
It will ask before publishing. Making an entry live is a confirmed action — the agent shows you what it's about to do and waits. Same for deleting anything.
It will refuse a field you didn't define. If it tries to store something outside your schema, the write fails and tells it which fields exist. Nothing is silently dropped, so what you see is what got stored.
Agents running on the OPVS skill runtime can install the SpiderPublish skill package for a guided version of all of this — see Skills for where to get it and how it's installed. If you're connecting a normal MCP agent, you don't need it: the tools are already there.
Related
Custom Collections for agents — the same feature from the agent's side.
Collections API — every operation, for developers.
Live Collections — showing your posts, authors and tags on a page. A different thing with a similar name.
Deploying your site — the step people forget.